Replacement for Toro Custom Eleven Sprinkler Controller
Searching the internet for a solution to a broken custom eleven was a joke. Here it is and you don’t have to email me to get it. This is a build your own solution. I’m using an SST-600i 6 zone by Rain Bird and 6 24 volt electric solenoid valves. Those of you familiar with the hydraulic controller know the valves buried (who knows where) operate when the controller releases the water pressure running from the water valve through the ¼” tubing to the ¼” drain tube. When the pressure releases, the zone valve opens to the zone’s sprinkler heads. When the pressure rebuilds (contol valve closes) the zone valve closes.
The Toro Custom Eleven sends the released water to the ¼” drain line. If your lawn professional doesn’t know that this is a closed system when they are working on it and leave a hose off, you will have water running down your wall from the controller. Another story for another time. Get another lawn guy.
If the Toro Custom Eleven Hydraulic Controller is leaking you can use the following solution to fix the leaks and operate the sprinkler system manually. The new timer and electric solenoid valve solution will follow. Please read the entire instruction before ordering to be sure it will work for your replacement. Solenoids cannot be returned if they have been installed.
Manual Valve replacement for the Toro Custom Eleven Hydraulic 6 Zone Control system:
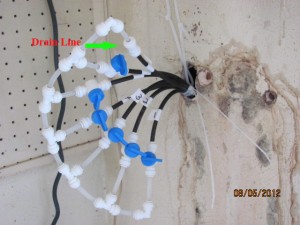
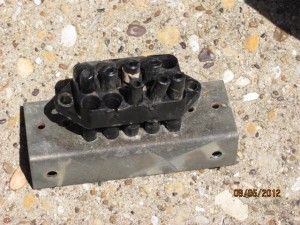
Turn off the water before removing your Custom Eleven. I used ¼” John Guest fittings to replace the controller – 6 cut off valves, 5 Tee’s, 2 elbow fittings, and 1 coupler. You can probably get by with making the connecting tubes 1 ½” to 2” long. You need 13 pieces of ¼” tubing. Here’s a picture of the masterpiece. All you need to do is open one valve and set your timer. When the timer goes off, close the valve and open the next. Let’s call it a Manually Hydraulic Human Control Timer.
When you cut the hydraulic tubes from the old controller be sure to mark them, especially the drain.
I installed the valves so the handle points to the black tube when it is opened. Makes it easier to explain to someone you need to operate it.
*** Please try the manifold described above to be sure this solution will work for you. ***
Toro Custom Eleven Hydraulic Sprinkler Controller Replacement
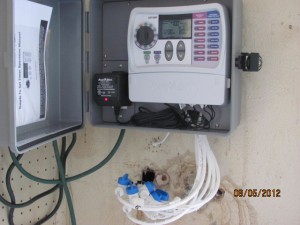
I used an SST-600i Rain Bird 6 zone controller with 6 – 24vac electric solenoid valves in an Orbit Sprinkler Timer Cabinet. This project is for a real do it yourselfer. If your not comfortable with electrical, please ask a handy man to hook this up for you. I had to connect an extension cord to the GFI receptacle because we did not have an outlet where the old controller was installed.
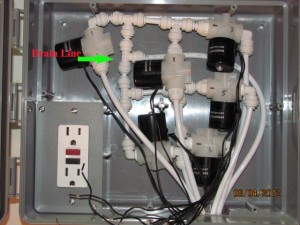
Connect the arrow side of the all the valves to the drain line. You can get fitting counts from the picture. Connect a tube to each valve inlet allowing 10 to 12 inches to extend from the box. Hang the box.
Connect the tubes from the zone valves to the tubes from your solenoid valves, you can turn on the water and check for leaks. Connect one wire from each valve to a piece of 20 gauge about 12” long using a crimp on lug or wire nut. That will be your common wire that you’ll hook to the controller. Mark the other wires per zone.
Install the timer per the timer and Orbit cabinet instructions.
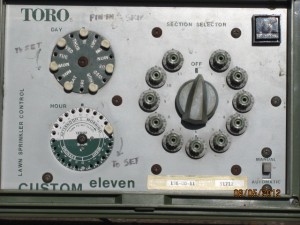
Toro Custom Eleven Hydraulic Sprinkler Controller front
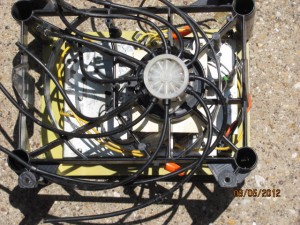
Toro Custom Eleven Hydraulic Sprinkler Controller back
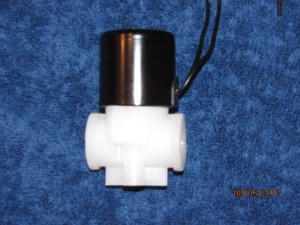
24 vac solenoid valve – $15.00 plus shipping
Normally closed solenoids – currently out of stock.
.
4 replies on “”
Hi, it is very important NOT to over tighten the fittings to these valves. They are Plastic and will deform if tightened down too much. Also, be sure the water flow is in the direction of the arrow on the valve. This 24v solenoid can be used in drinking water applications. If you have a water cooler and you are tired of lifting or buying bottled water, you can run a water line to a filter and this solenoid and use it to replace the bottle on your water cooler. Contact-us for details.
Just a clarification note – when the solenoid opens it relieves the water pressure to the hydraulic valve in the ground. Water flows through the solenoid to the drain line opening the hydraulic valve in the ground (zone). When the time for the zone has been met the solenoid valve closes building pressure in the 1/4” tube closing the hydraulic valve. This is why all solenoid valves have to be connected to the drain line. Connect one wire of all of your solenoid valve to the common and the other wire to the zone the solenoid will control on the sprinkler controller.
Make sure all of the arrows on the valves are pointing to the drain line. Maybe this site might help. http://lukeupsolutions.blogspot.com/. The 3rd picture is of a manual manifold and basically how it works without a Toro.
I have this old Toro System and the watering seems ok. My problem is that the time is bound up and the knob barely turns. Any suggestions?
Thanks.
Bill Hunt
Hi Bill, This is why we had to replace ours. The timer mechanism just started giving up. It would get stuck on one zone, then turning the knob got difficult. One zone stopped working. I had a landscape expert look at it and he really didn’t know what he was doing. That is why my wall looks like it does in the picture.
We have one other brave soul attempting to replace the hydraulic timer with a new electronic timer using our solenoid idea. 30 years ago this hydraulic controller was an engineering marvel. We got tired of trying to keep it running. As soon as we hear from Mike in Michigan, we’ll post his pictures of how his field engineering went.
Here is another link with a different lay out of the valves that might give you some ideas if you wanted to try replacing the hydraulic.
http://lukeupsolutions.blogspot.com/
Wish I could be better help to you. Maybe someone will come across this blog and shoot a response. Best of luck, Luke. <><